
Pryvate User Portal
Your communications. Your privacy. Your control. How to manage the account behind the Pryvate app — signing in, your details, your password, call and payment history, and Remote Wipe.
Contents
- 1.1About Pryvate
- 1.2The page and its menu
- 1.3Signing in
- 1.4Creating an account
- 1.5The three kinds of account
- 1.6Your account page
- 1.7Changing your details
- 1.8Your password
- 1.9If you have forgotten your details
- 1.10Your calling credit and number
- 1.11Call history
- 1.12Payments, receipts and refunds
- 1.13Devices & Remote Wipe
- 1.14If your company invites you
- 1.15Deleting your account
- 1.16Signing out
- 1.17Frequently asked questions
Using the portal
Everything you can do with your own Pryvate account from the web — signing in, keeping your details up to date, checking your history, and wiping a device you have lost.
1.1About Pryvate
Pryvate gives you private, secure communications designed to keep you in control of your account and your conversations.
The Pryvate app is where you make encrypted Pryvate-to-Pryvate calls, send messages and communicate with other Pryvate users. The Pryvate User Portal — this website — is where you manage the account behind the app: your details, security, devices, calling credit, payments and Remote Wipe.
Your communications happen in the app. Your account controls live here. You don’t need the portal to make a call or send a message; use it when you want to manage your account, review a payment, manage a device or change an account setting.
Think of the manual the way the portal is arranged: Pryvate and your privacy (this section and 2.2) → your account (1.3–1.9) → your calling (1.10–1.11) → your payments (1.12) → your devices (1.13) → your organisation (1.14).
- Sign in — Go to n.pryvatenow.com/home, enter your mobile number, and type the four-digit code that arrives. There is no password to remember.
- Find your way around — The left sidebar lists six sections — Overview, Profile, Calling, Devices & Wipe, Billing, Security & Account. Select a section, then a tile inside it.
- Change something — Open Profile, edit the field, and select Save changes.
- Look something up — The Calling and Billing sections open your call history and your payments right there in the page.
1.2The page and its menu
The portal now works the way the Pryvate Business portal does: a dark blue bar across the top, a left sidebar of sections, and inside each section a row of tiles — one per topic — that open into panels on the same page. Nothing navigates away; you open what you need and close it again.
The address of the portal is n.pryvatenow.com/home. It is worth bookmarking — the portal is a normal website and works in any browser, on a phone as well as a computer.
What is in the top bar
| Item | What it does |
|---|---|
| Pryvate logo | Takes you back to the Pryvate website. |
| Why Pryvate, Features, For Business, Contact, Blog | Open pages on the main Pryvate website. They are marketing pages, not part of your account. |
| Login / Logout | Before you sign in this reads Login, with a choice of Single User — your own account, which is what this manual covers — and Business User, the separate portal for company administrators. Once you are signed in it reads Logout. Both open in the same window. |
| Download | Takes you to the app download page for your phone. |
| Moon or sun icon | Switches the page between light and dark. See below. |
The sidebar, tiles and panels
The sidebar lists the six sections of your account — Overview, Profile, Calling, Devices & Wipe, Billing, Security & Account. Select one and its tiles appear; select a tile and its panel opens beneath. Each section also has Open all, Close all and Hide tiles buttons, so you can lay the page out however suits you. The Collapse button at the top of the sidebar folds it to a slim rail of icons — hover to peek, select again to expand.
Dark mode
The small moon icon at the right-hand end of the bar switches the page to a dark background, and the sun icon switches it back. It changes only how the page looks on this device — nothing about your account changes, and nobody else sees the difference.
The footer
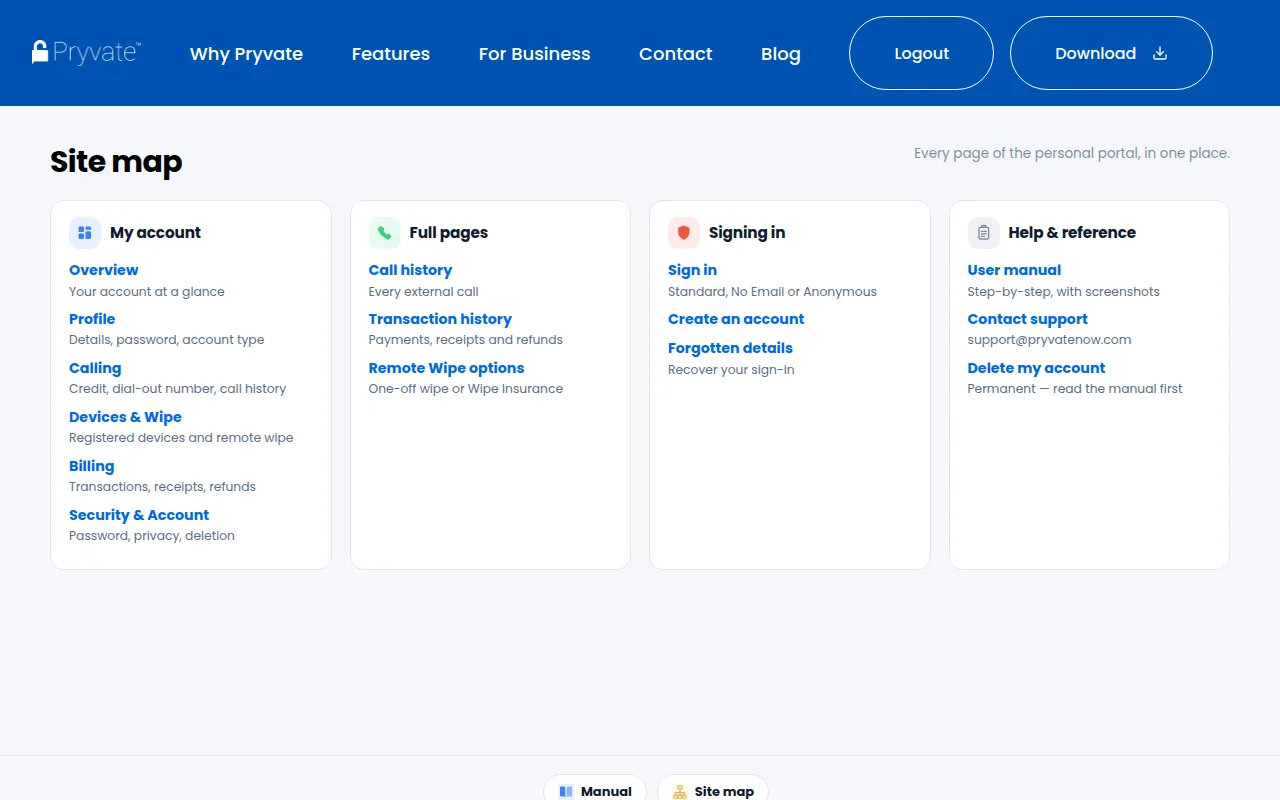
The foot of every signed-in page carries two buttons — Manual, which opens this document, and Site map, which lists every page of the portal in one place — with support and policy links beneath them.
1.3Signing in
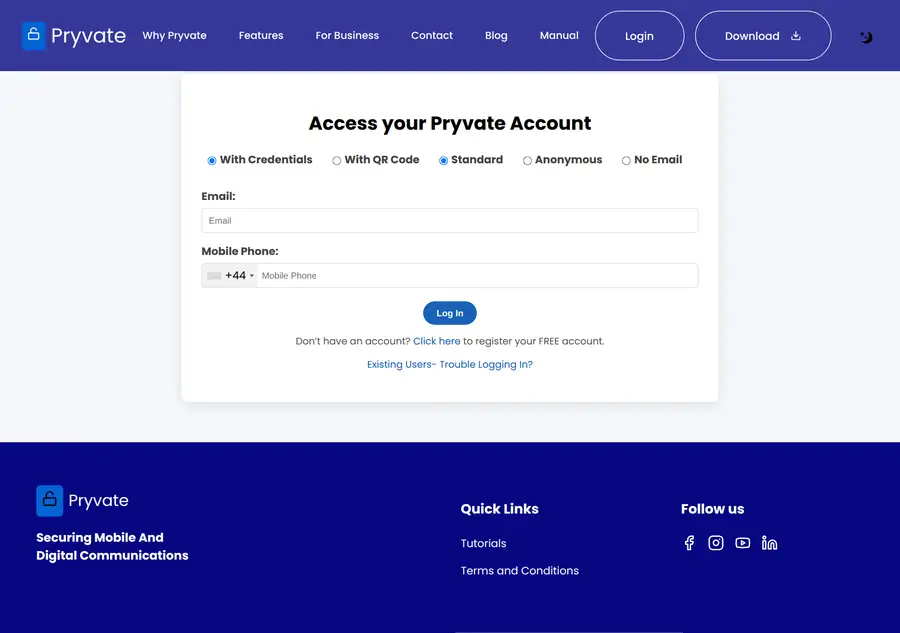
There is no password to type. Pryvate identifies you either by your mobile number and a one-time code, or by scanning a QR code with the app on your phone.
With a one-time code
- Leave With Credentials selected.
- Choose your account type — Standard if you registered with an email address, No Email if you registered with a mobile number only, Anonymous if you use a Pryvate number rather than your own SIM. Section 1.4 explains the difference.
- Enter your email address and mobile number. Pick your country from the flag dropdown so the dialling code is right.
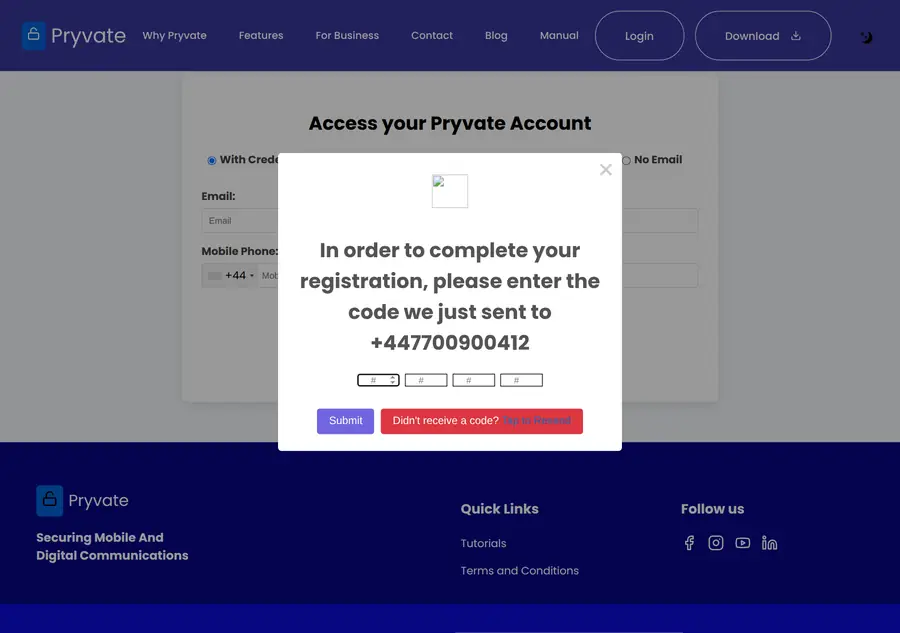
- Select Log In. A box appears asking for a four-digit code.
- Enter the code that arrives by SMS or email, then select Submit.
With a QR code
- Select With QR Code at the top of the sign-in page. A square code appears.
- Open the Pryvate app on your phone and scan it.
- The browser signs itself in within about ten seconds. Leave the page open while it does — it refreshes on its own while it waits.
This is the quickest route if you already have the app open, and the only route that does not need a code to arrive.
From a link
If support sends you a sign-in link by email, selecting it signs you straight in. Each link works once and then expires, so ask for a fresh one rather than reusing an old email.
1.4Creating an account
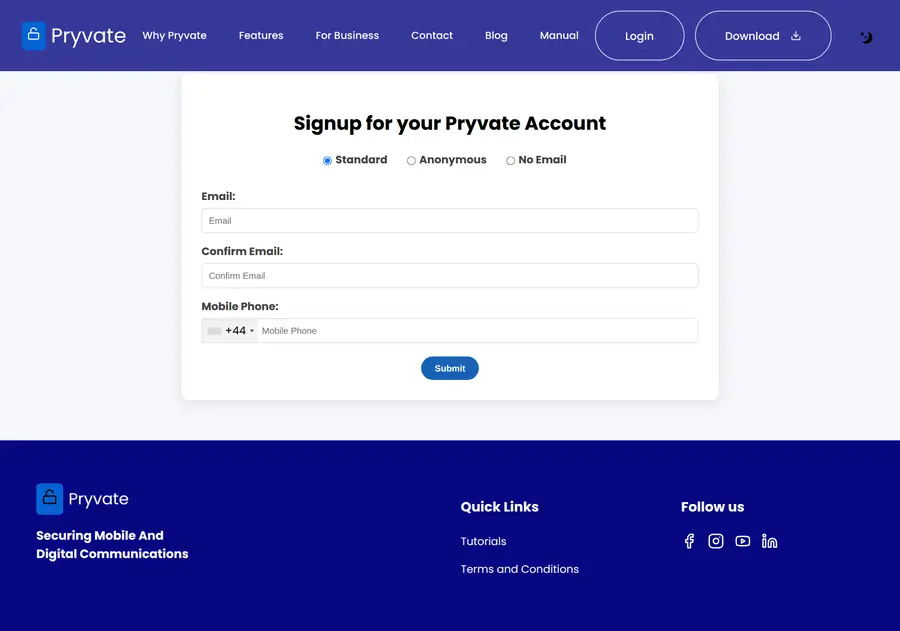
- On the sign-in page select Register, or go straight to the registration page.
- Choose Standard to register with an email address, or No Email to register with a mobile number only.
- Enter your email address twice — the second box must match the first exactly.
- Enter your mobile number, choosing your country from the flag dropdown.
- Tick the I am human box.
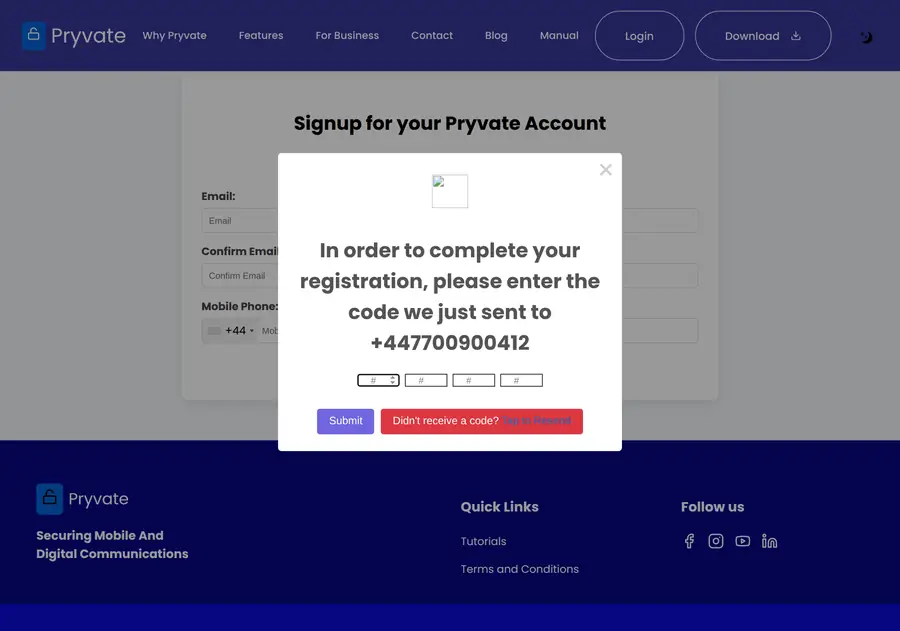
- Select Register, then enter the four-digit code that arrives.
1.5The three kinds of account
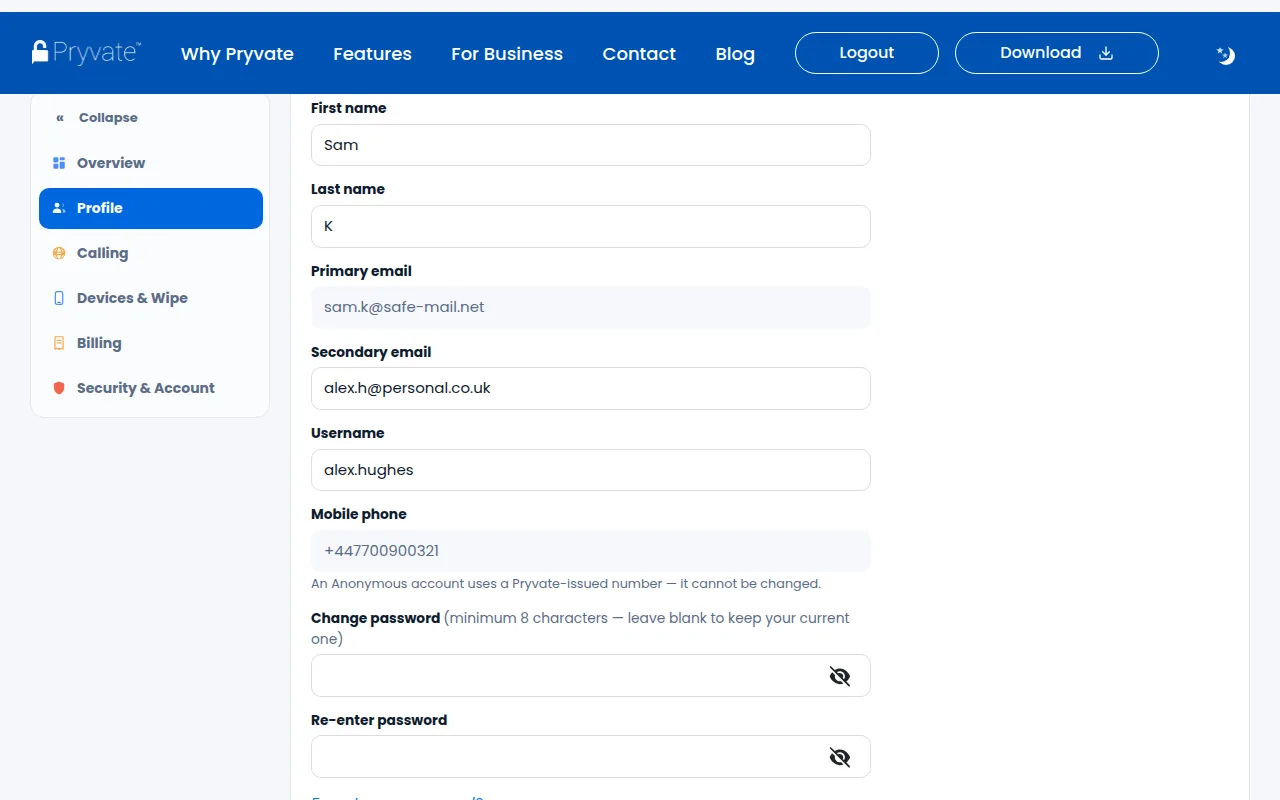
Standard — you registered with an email address and mobile number.
No Email — you registered using only your mobile number.
Anonymous — you use a Pryvate-issued identity rather than your own mobile number.
Which account you have decides how you sign in and what the portal shows you.
| Account | What it is | What is different |
|---|---|---|
| Standard | Registered with an email address and your own mobile number. | Everything is available. Codes can go to your email or your phone. |
| No Email | Registered with a mobile number only. | The email fields are hidden. Codes arrive by SMS only, and the forgotten-details page cannot help you. |
| Anonymous | Uses a Pryvate-issued number instead of your own SIM. | The mobile number is fixed and cannot be changed. Codes go to your email rather than by SMS. |
1.6Your account page
Signing in lands you on the Overview — your account at a glance, and shortcuts into everything you can manage.
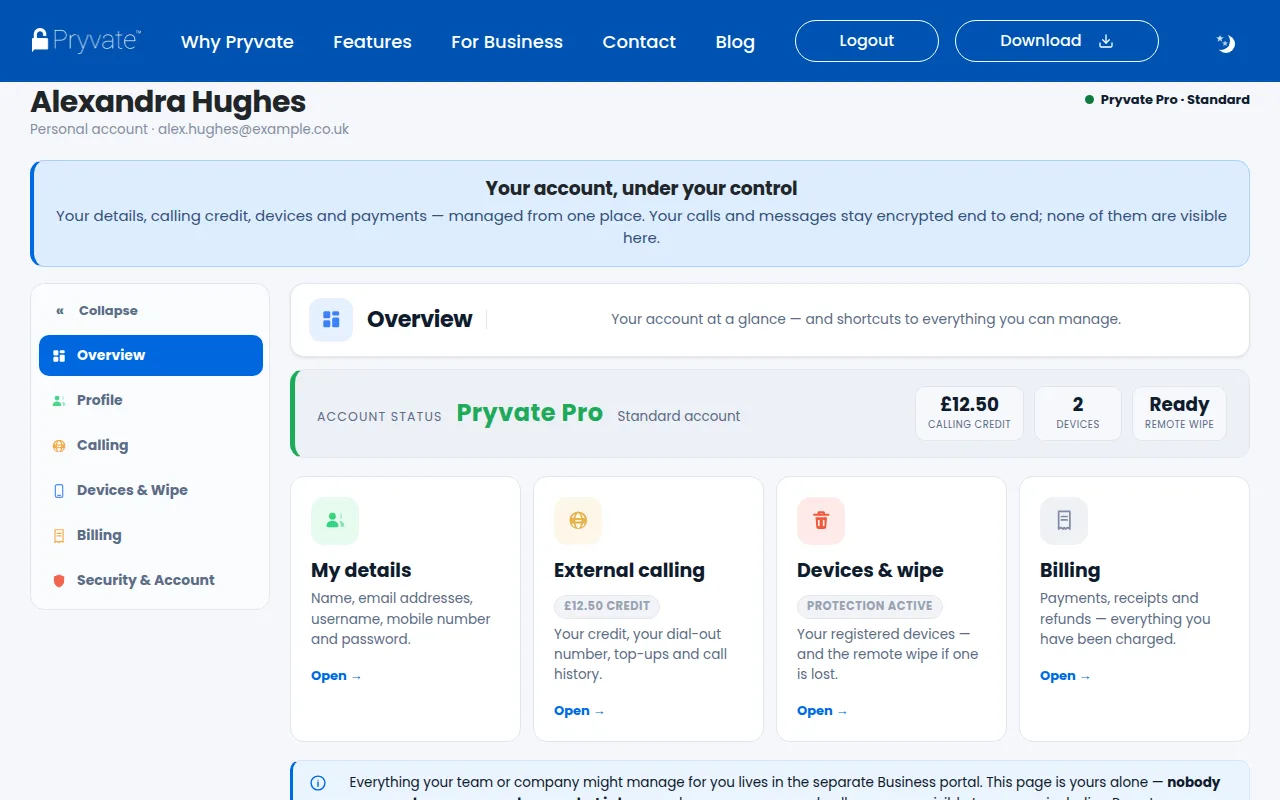
The six sections of the sidebar carry everything the old single page held, and more:
| Section | What lives there |
|---|---|
| Overview | The status band, quick cards, and the privacy note — this page is yours alone. |
| Profile | Your details and password, and what your account type means (section 1.7 and 1.8). |
| Calling | Your external-calling credit, your dial-out number, top-ups and call history (1.10 and 1.11). |
| Devices & Wipe | The devices signed in to your account, and Remote Wipe (1.13). |
| Billing | Payments, receipts and refunds, and your subscription (1.12). |
| Security & Account | Password and recovery, privacy, your organisation, and account deletion (1.8, 1.14, 1.15). |
The Subscription field in Profile is filled in for you and reads one of:
- Not subscribed — no active subscription.
- Voucher account — subscribed using a voucher code rather than a payment.
- Pryvate Pro — a paid subscription.
1.7Changing your details
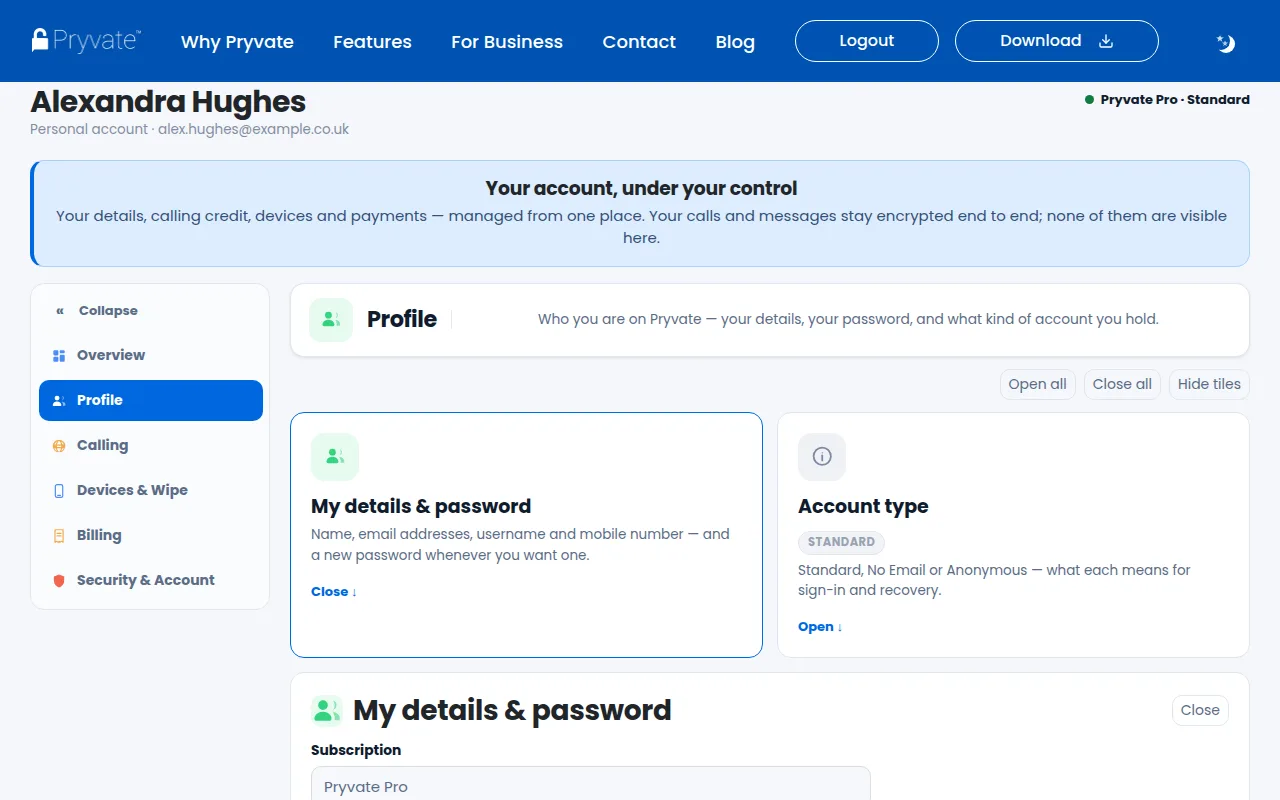
- Open Profile in the sidebar. The My details & password panel is open by default.
- Edit any of First name, Last name, Username or Secondary email.
- To change your mobile number, select Change mobile phone number, then enter the new number with the right country code. The portal checks immediately that nobody else is using it.
- Select Save changes.
1.8Your password
Your password is what you use in the Pryvate app on your phone. You do not need it to sign in to this portal.
Setting a new password
- In Profile › My details & password, type the new password into Change password, then again into the box below it. Leave both blank to keep your current one.
- Watch the strength meter as you type. It looks for at least eight characters, a capital, a lower-case letter, a number and a symbol.
- Select Save changes.
Resetting a forgotten password
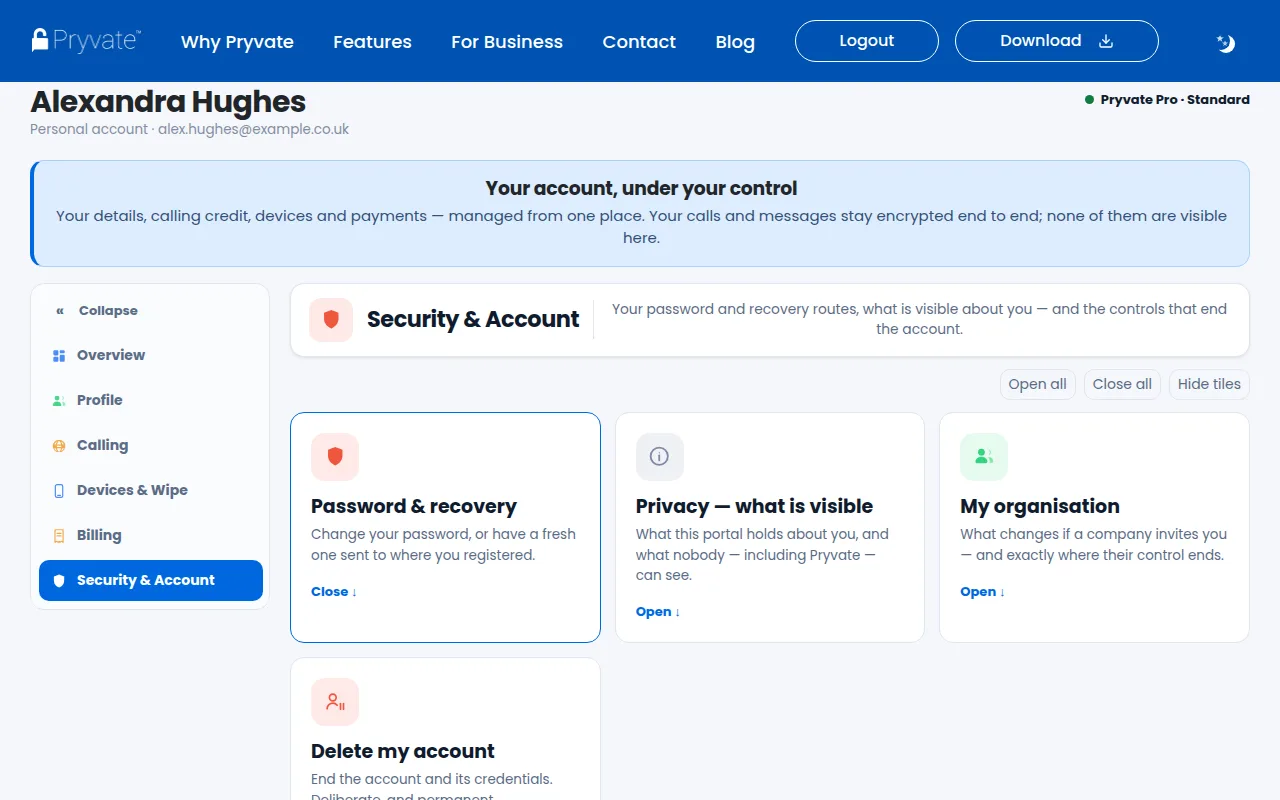
- Open Security & Account in the sidebar.
- In Password & recovery, select Email me a new password.
- A fresh password is sent to your email address, and by SMS as well if your account has a usable mobile number.
1.9If you have forgotten your details
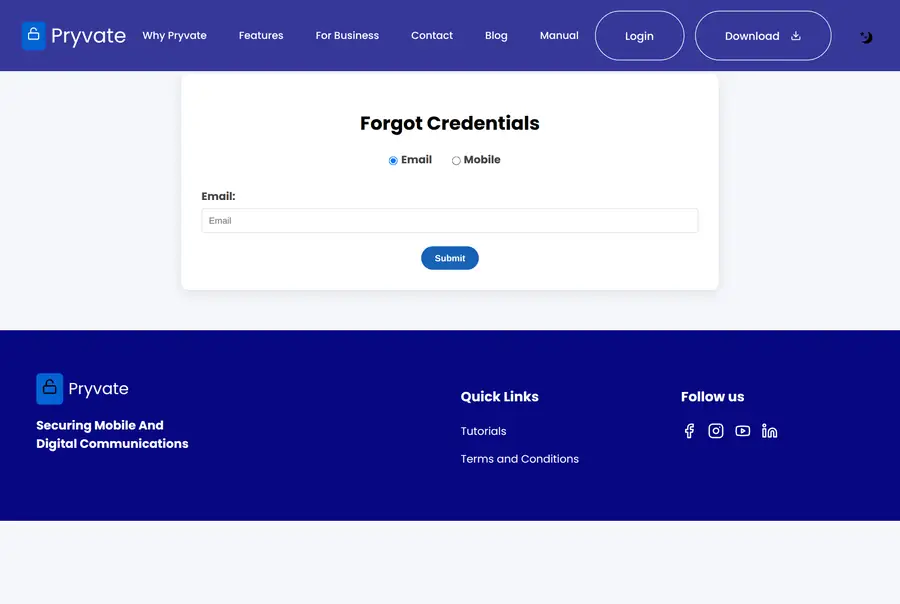
If you cannot remember which email address or mobile number your account uses, the recovery page will remind you.
- On the sign-in page, select Forgot your credentials?
- Choose whether to search by Email or by Mobile.
- Enter the one you do remember and select Submit.
- Pryvate sends the matching detail to that address or number.
1.10Your calling credit and number
Calls between Pryvate users are free and encrypted end to end. Calling an ordinary phone number goes over the public network instead — that is external (Offnet) calling, and it uses credit. It all lives under Calling in the sidebar.
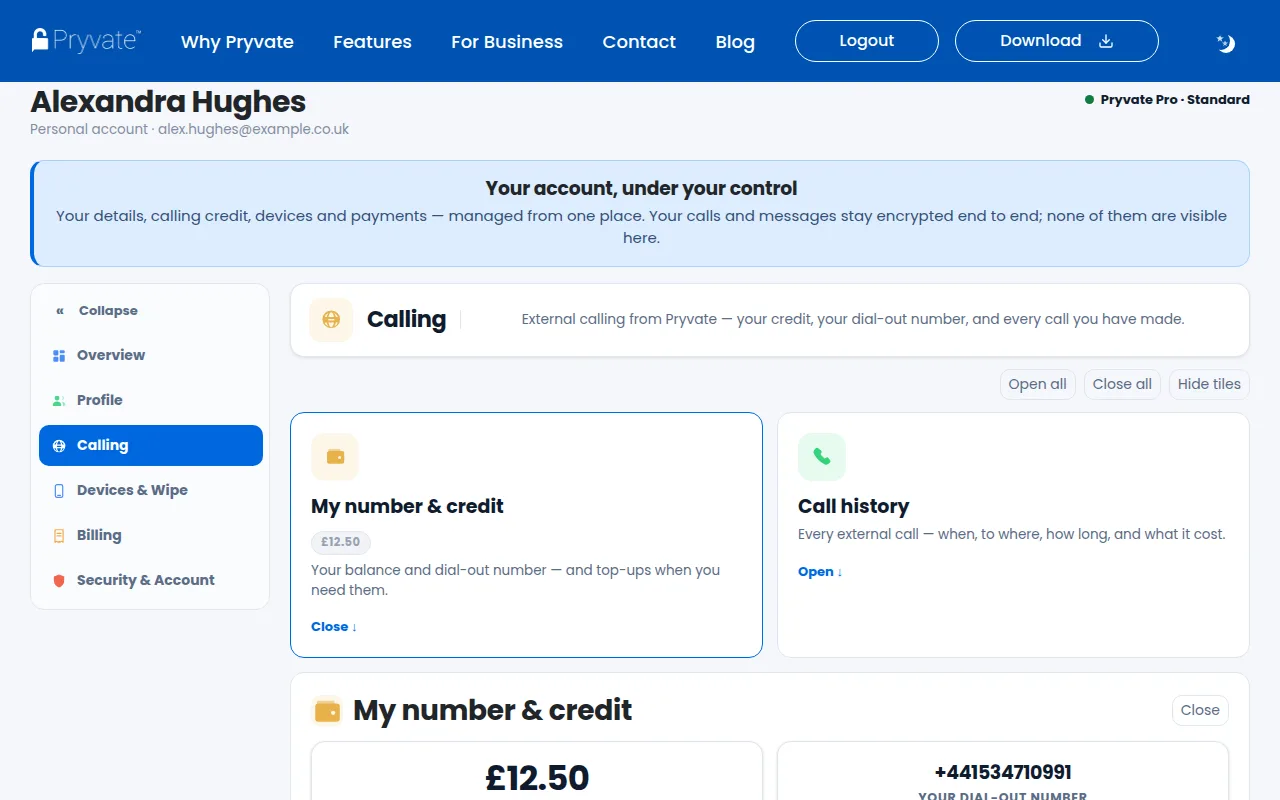
- Balance credit is what you have left. Unused credit never expires — it stays yours until you spend it.
- Your dial-out number is the ordinary phone number attached to your account — the number people outside Pryvate see when you call, and can ring you back on.
- Top up credit offers fixed amounts and takes you to PayPal; the credit lands when the payment completes.
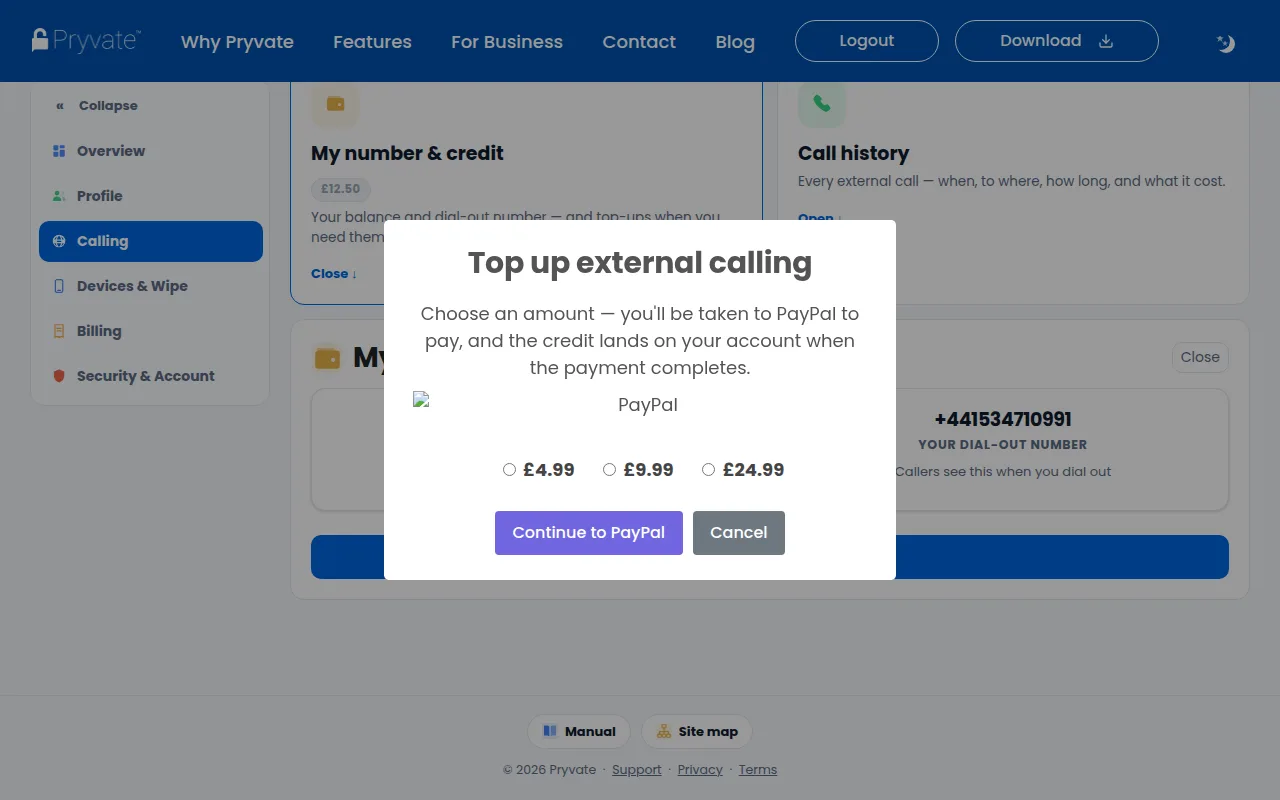
If the panel says External calling isn’t set up, you do not have a number yet — adding credit starts the process and issues your dial-out number.
1.11Call history
Open the Call history tile under Calling. Your calls appear right there in the page, newest first, with a search box and paging.
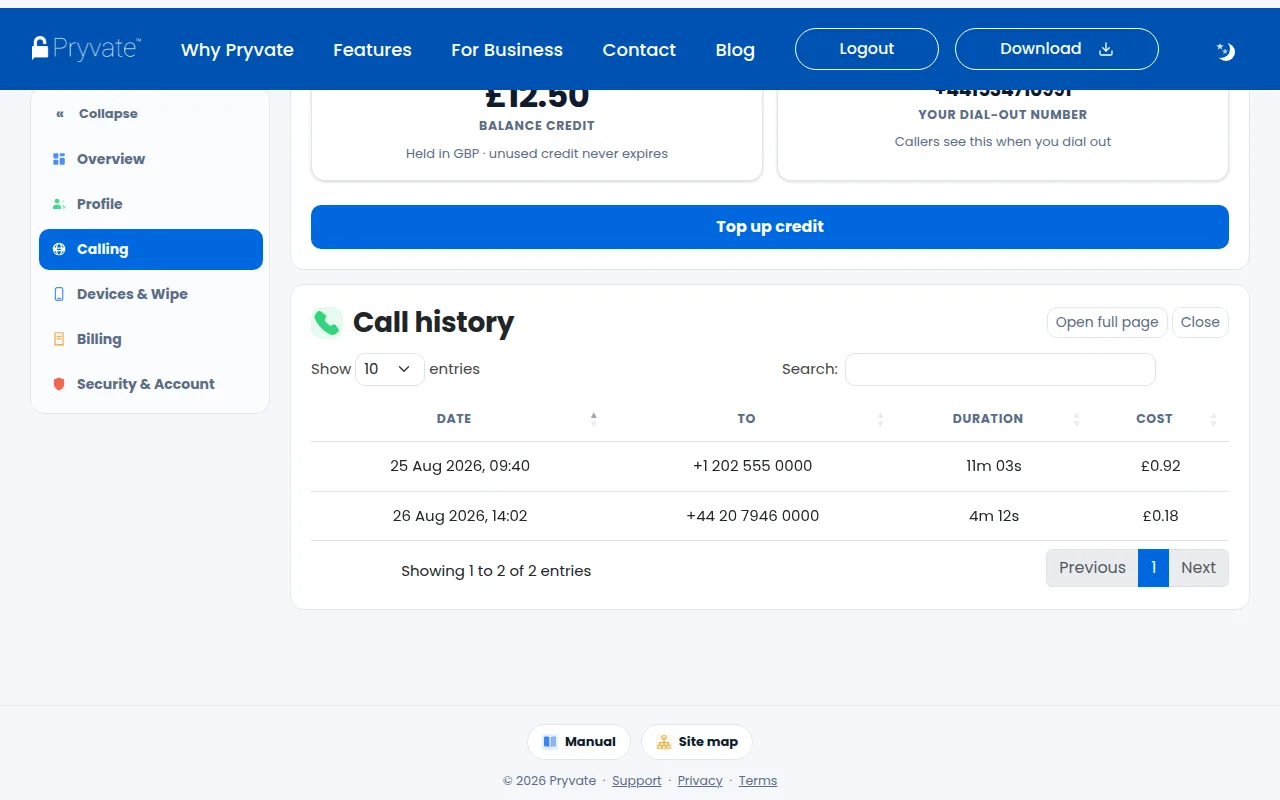
- Each row shows when the call was, the other number, how long it lasted and what it cost.
- Open full page shows the complete view, split into Recent, Outgoing and Incoming.
1.12Payments, receipts and refunds
Open Billing in the sidebar. The Transactions & receipts panel lists everything you have paid, newest first; the My subscription tile summarises what you are subscribed to.
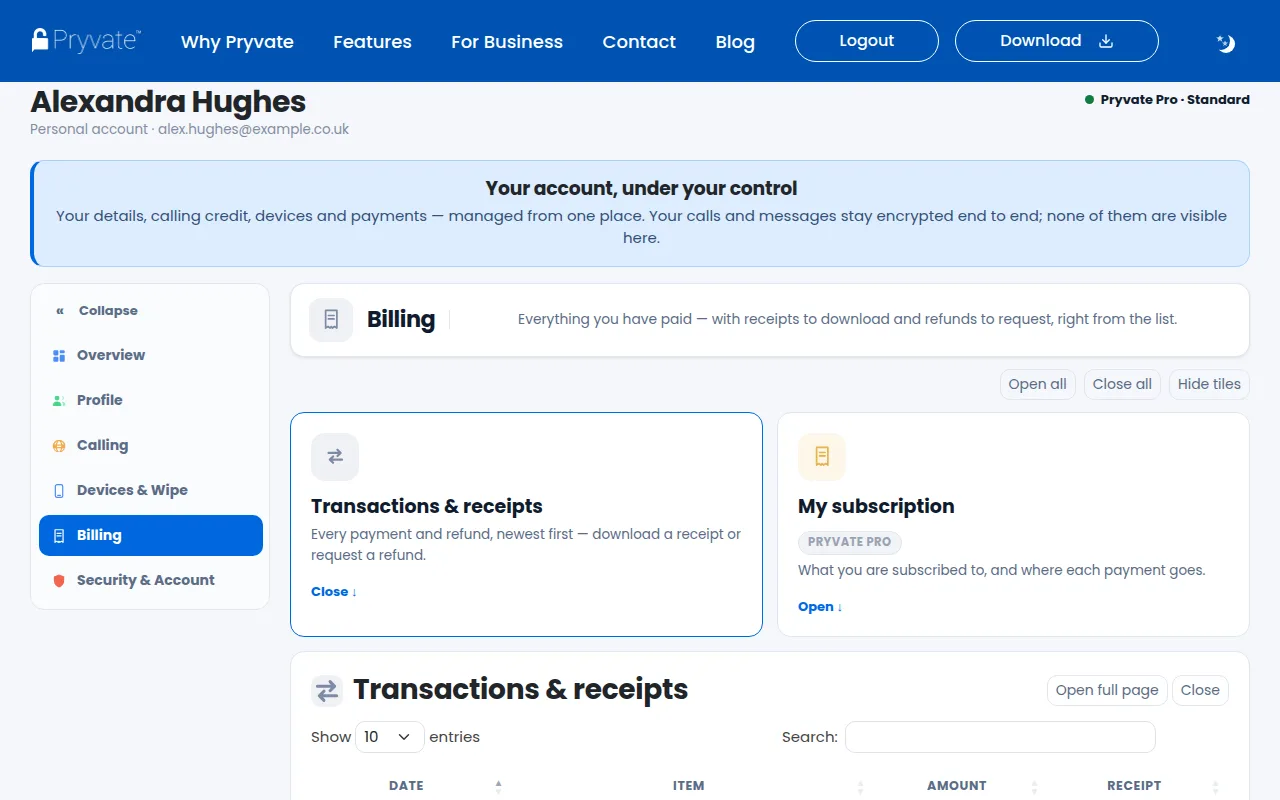
- Find the payment in the list — each row shows the date, order number, currency and amount. The search box narrows it instantly.
- Select Receipt on that row to download a receipt.
- To ask for a refund, select Open full page, tick one or more rows, select Refund Request, give your reason in the box that appears, and send it.
1.13Devices & Remote Wipe
Devices & Wipe in the sidebar lists every device signed in to your account — and carries Remote Wipe, for the day one of them is lost, stolen, or passed on. Wipe protection is bought separately from your subscription.
Buying Remote Wipe
- Open the Wipe protection tile. If it reads Not purchased, select Buy Wipe protection.
- Choose one of the two options.
- Pay through PayPal. You are returned to the portal afterwards.
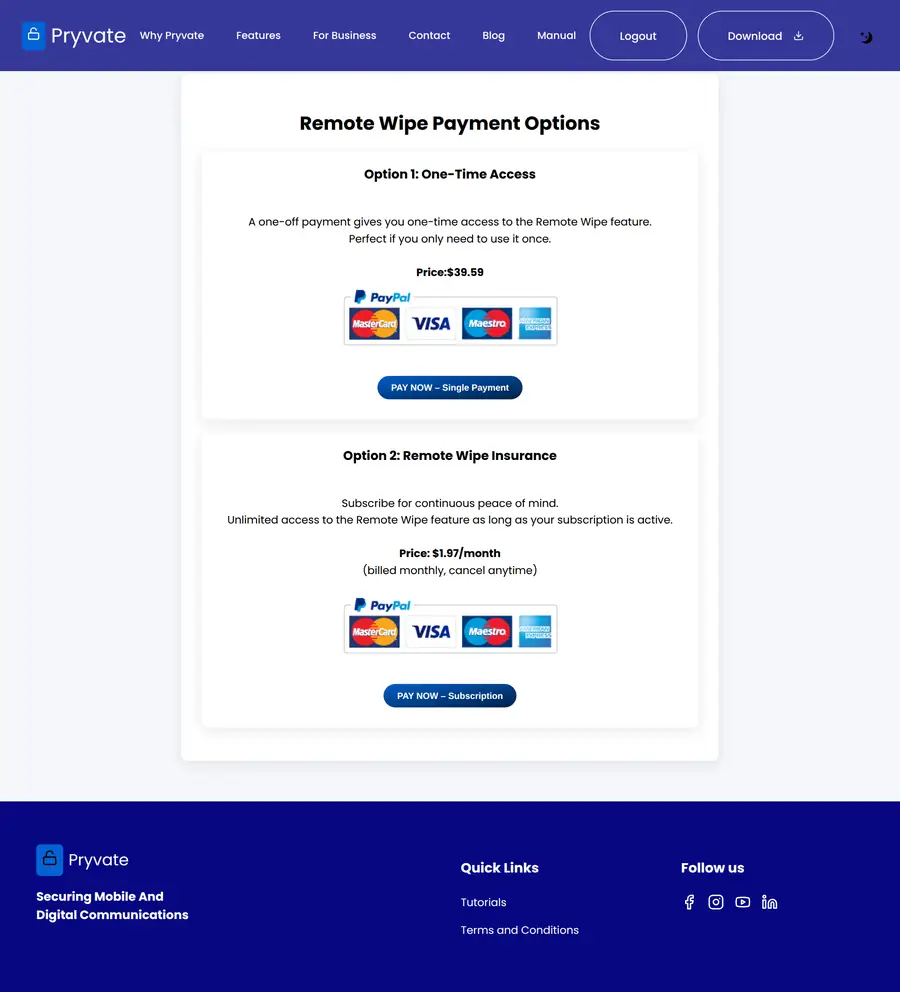
| Option | What you get |
|---|---|
| One-Time Access | A single wipe. Once you have used it, you would buy again for the next one. |
| Remote Wipe Protection (monthly) | A monthly subscription covering wipes for as long as it runs. |
Wiping a device
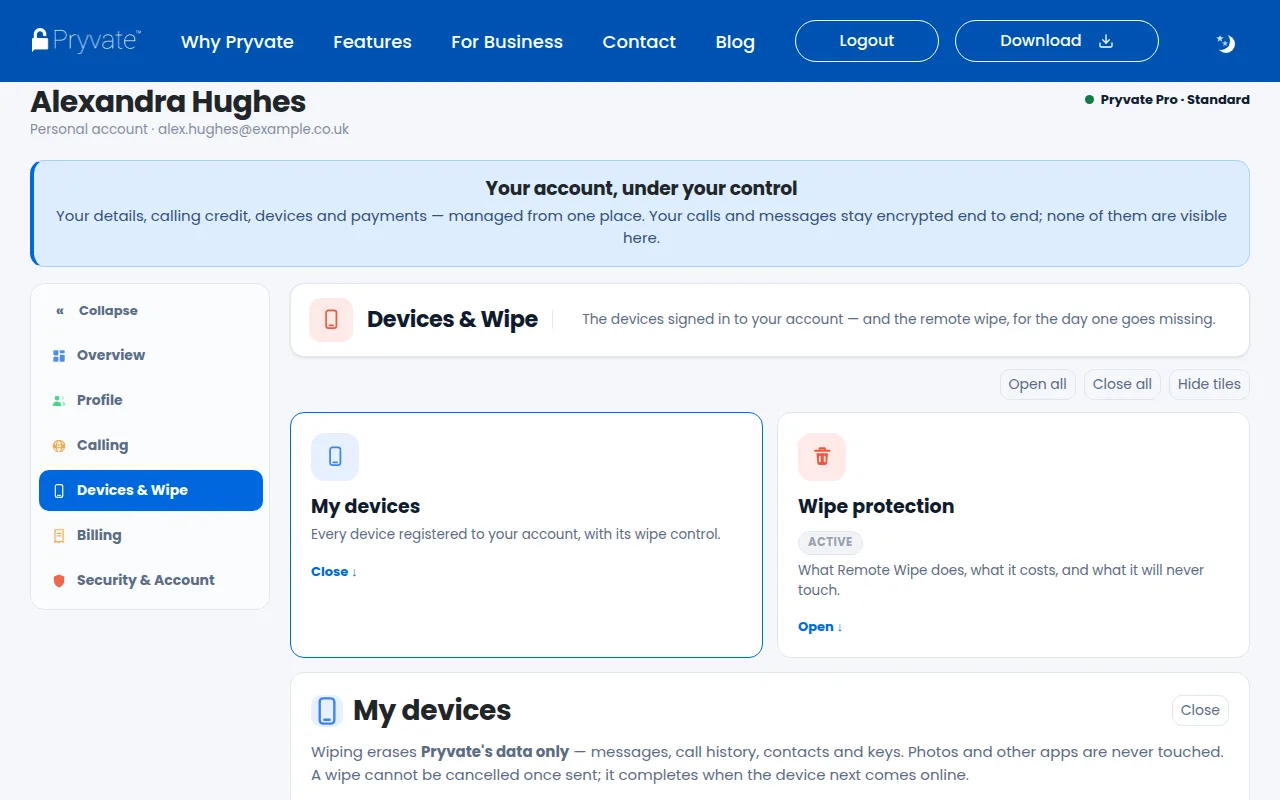
- Open the My devices tile. Every registered device is listed with its own wipe control.
- Select the wipe icon beside one device — or Wipe all devices to cover everything at once.
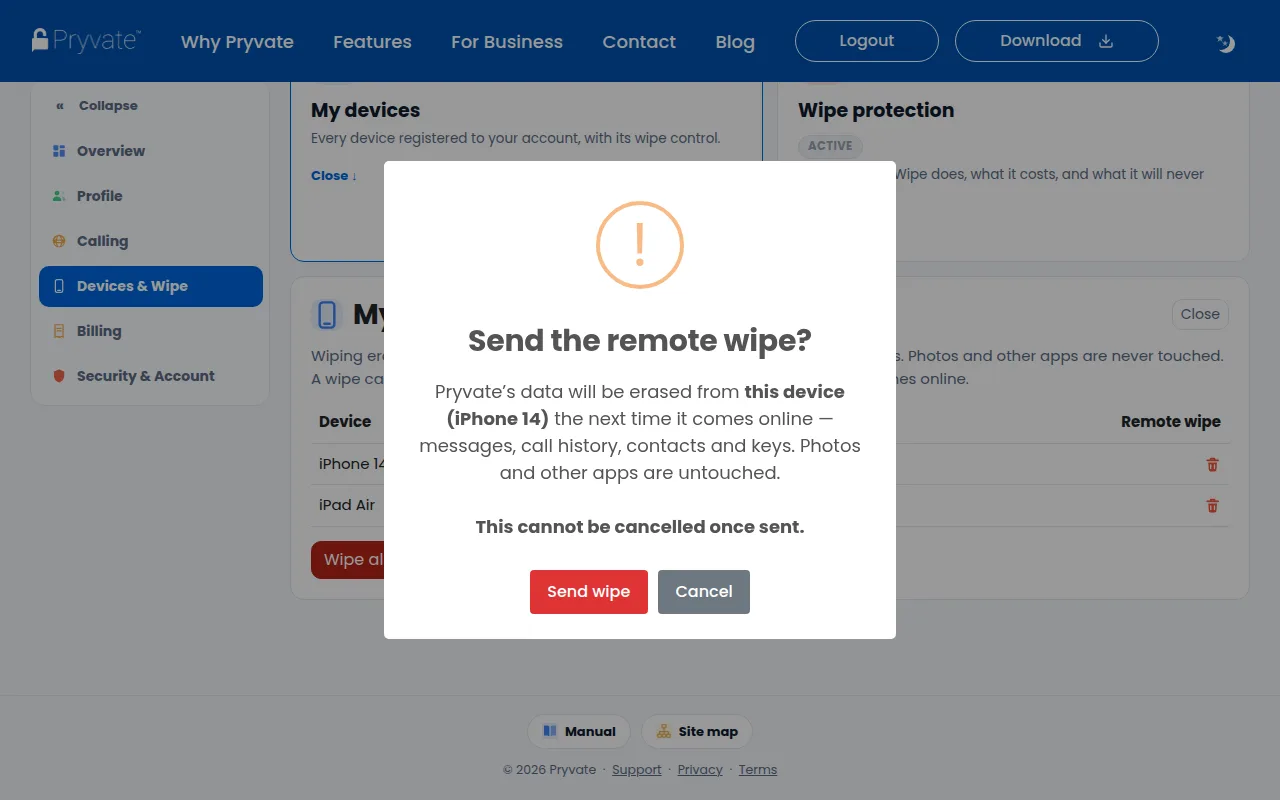
- Read the confirmation carefully, then select Send wipe.
1.14If your company invites you
Joining Pryvate Business doesn’t mean giving your employer access to your private conversations. If your organisation invites you to join its Pryvate Business environment, it can provide and manage business services associated with your account. It does not gain access to the content of your Pryvate-to-Pryvate messages or calls.
If your employer runs a Pryvate Business account, they can invite you to move your Pryvate account onto it. The company then pays for your account, and you keep your personal Pryvate number, the app and the contacts you already have.
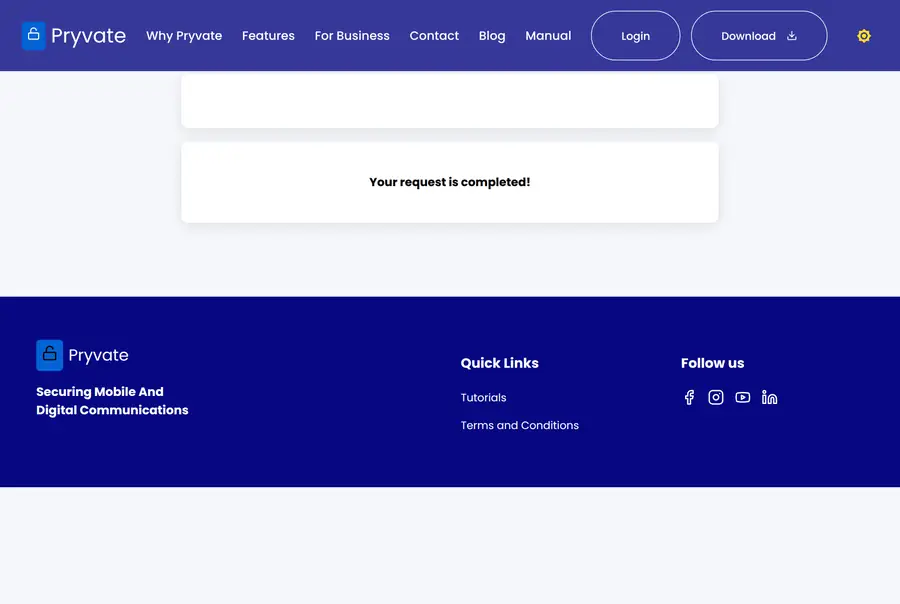
- You receive an invitation naming the company.
- Select the link in it. A page opens confirming who is inviting you.
- Tick the I am human box and select Accept.
- Your account is upgraded straight away. Nothing else changes for you.
What your employer can and cannot see
Your administrator can see your name, username, email address and mobile number, your registered devices and their wipe status, and the running total of your external calls and credit. They cannot see your messages, they cannot hear or list your Pryvate calls, and they cannot change your details — only you can.
What being on a company account means
- They pay. The company covers your subscription from the moment you accept, and can assign you services from its own pools — a secure-meeting licence, or external calling with a company number and credit.
- They can suspend. An administrator can put your company access on hold — the services they provide stop, but your personal Pryvate app sign-in is unaffected, and suspension is reversible.
- They can wipe company data. If a device is lost, or when you leave, they can erase Pryvate-managed data from it — the same precise scope as your own Remote Wipe: never your photos or other apps.
- Their actions are recorded. Everything administrative they do — invitations, assignments, suspensions, wipes — lands in their audit log with who, what and when. Your content never does.
- Leaving is clean. If they remove you (or you leave), company-provided services — meeting licence, company-provided external calling number, unused company credit — return to the organisation, and your personal account, number and contacts stay yours.
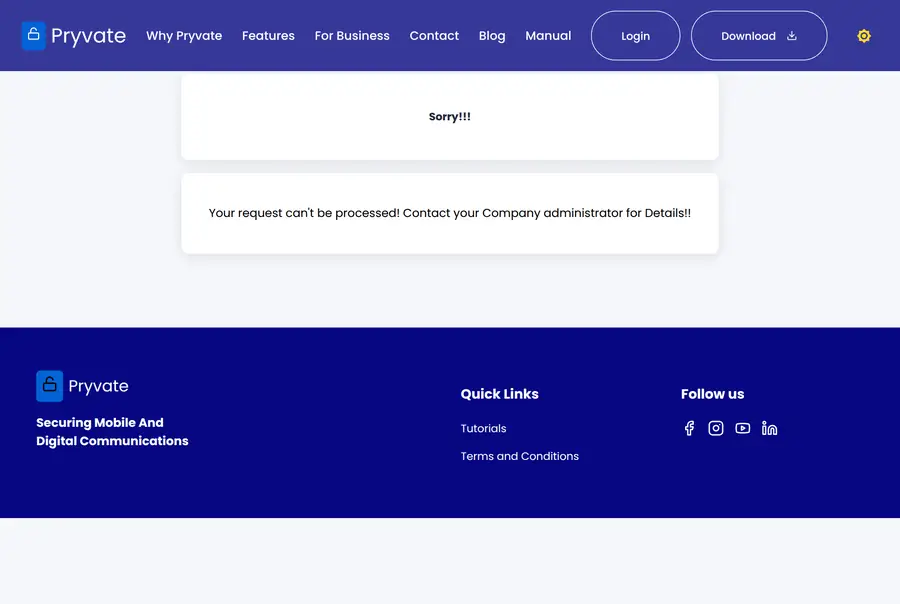
An invitation does nothing until you accept it, and it names the company so you can check it is the one you expect.
1.15Deleting your account
Deleting removes your Pryvate account and its data. It cannot be undone.
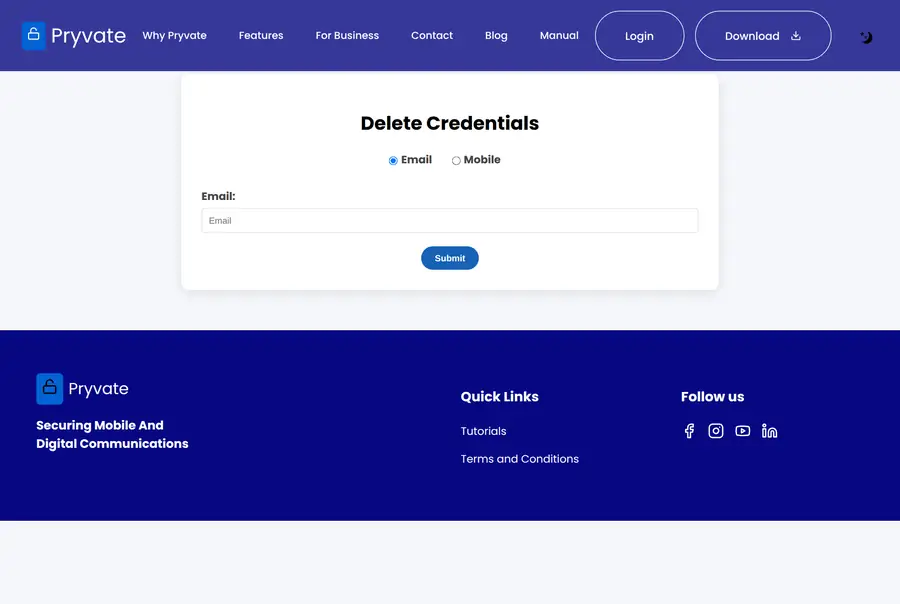
- Open Security & Account › Delete my account, read the warning, and select Delete my account… — or open the delete page from the link at the foot of the sign-in page.
- Choose Email or Mobile and enter the matching detail.
- Tick the I am human box and select Submit.
- Confirm from the message Pryvate sends you.
1.16Signing out
Select Logout in the top bar. You are signed out at once and returned to the sign-in page, in the same window.
For safety the portal also signs you out on its own after a period of inactivity. If a page stops responding to your selections, that is usually why — sign in again and carry on.
1.17Frequently asked questions
Reference
What you need to use the portal, what is and is not visible, the words used throughout, and what to do when something goes wrong.
2.1What you need
| Browser | Any current version of Chrome, Edge, Safari or Firefox. The portal is also usable on a phone browser. |
| Connection | An ordinary internet connection. No plug-in, extension or download is needed to use the portal. |
| The app | Sign-in by QR code needs the Pryvate app installed on your phone. Everything else works from the browser alone. |
| Downloads | Receipts arrive as PDF files, so a computer is easier than a phone when you need one. |
| Payments | Payments are taken through PayPal, which opens in its own window. A PayPal account or a card is needed. |
2.2Privacy and what is visible
Two questions come up more than any other: what can Pryvate see, and — if your company has invited you onto its account — what can your administrator see. The short answer to both is: much less than people assume.
Message and call content is never visible in the portal.
Pryvate-to-Pryvate calls and messages are encrypted end to end. Their content is never visible in the portal — not to you, not to a company administrator, and not to Pryvate.
Offnet calls are recorded as metadata only.
Because they cross the public telephone network, Offnet calls are logged so they can be billed. What is stored is the other number, the time and the duration — never the audio.
Company administrators see less than people expect.
An administrator can see a colleague's name, username, email, mobile number, Offnet call counts and credit spending. They cannot see message content, call content, or who was called on Pryvate itself.
Remote Wipe touches only Pryvate.
It erases Pryvate's own data from the device — messages, call history and account details. Photos, other apps and the rest of the phone are untouched.
Sessions end on their own.
The portal signs you out after a period of inactivity, which limits what a shared or unattended computer exposes.
2.3Glossary
| Term | Meaning |
|---|---|
| Section / tile / panel | How the portal is laid out: sections in the left sidebar, tiles inside each section, and panels that open beneath a tile without leaving the page. |
| Remote Wipe Protection | The monthly Remote Wipe subscription — wipes are covered for as long as it runs, as opposed to a One-Time purchase. |
| Site map | The page listing every screen of the portal, linked from the footer. |
| Offnet | Calling ordinary phone numbers rather than other Pryvate users. Offnet calls use credit and are the only calls that appear in call history. |
| Offnet number (DDI) | An ordinary phone number attached to a Pryvate account so people outside Pryvate can call it. |
| Remote Wipe | Erasing Pryvate's own data from a device you no longer control. Bought once, or by monthly subscription. |
| No Email account | An account registered with a mobile number only. Codes arrive by SMS and email recovery is unavailable. |
| Anonymous account | An account using a Pryvate-issued number rather than your own SIM. Created in the app, not on the web. |
| Voucher account | A subscription activated with a voucher code rather than a payment. |
| Pryvate Pro | A paid individual subscription. |
| One-time code (OTP) | The four-digit code sent when you sign in or register. It is the portal's only sign-in credential. |
2.4Messages Pryvate sends
| Message | How it arrives | When |
|---|---|---|
| Sign-in code | SMS, or email | When you sign in, register, or select Tap to Resend. Four digits. |
| Username reminder | Email or SMS | When you use the forgotten-details page. Lookups by mobile are limited to one a day. |
| Password reset | Email, and SMS where possible | A temporary password and a link to choose a new one. |
| Company invitation | When an administrator invites you into a company group. Valid for 24 hours. | |
| Invitation accepted | Confirms an account has moved onto the company subscription. | |
| Receipts | Downloaded from the portal | Payment history, receipt icon on the row. |
2.5Common problems
| What you see | What to do |
|---|---|
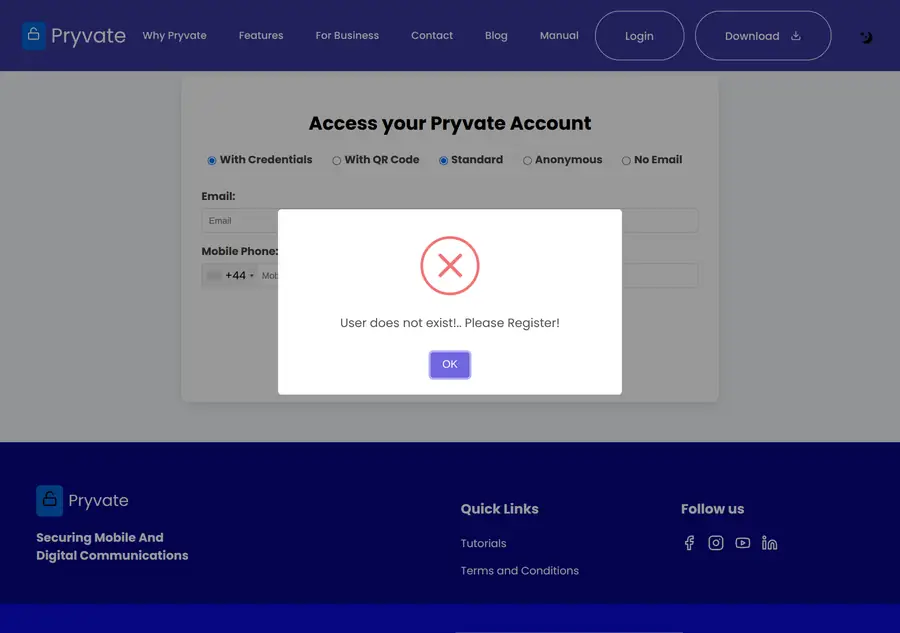
| "User does not exist!.. Please Register!" | The email or mobile number does not match an account. Check the country code first, or register instead. |
| "User already exist!.. Please Login!" | You are on the registration page but already have an account. Go to sign-in. |
| "Mobile Already Exists" | Another account is using that number. Use a different one, or ask support to release it. |
| "Email Already Exists!" | The address is already on another account, either as its primary or secondary email. |
| "Invalid Otp" | The four digits did not match. Request a fresh code with Tap to Resend rather than retyping an old one. |
| "Sorry! You are not allowed to do more than one attempt a day" | Username reminders by SMS are limited to one per day. Try by email instead, or wait until tomorrow. |
| The page stops responding to your selections | You have been signed out for inactivity. Sign in again — nothing is lost. |
2.6Getting help
If the answer is not here, email [email protected]. Include your account email address or mobile number so the team can find you.
When you write, it helps to include the email address or mobile number on the account, what you were trying to do, and the exact wording of any message the portal showed you.
Pryvate is a communications security product from Pryvate Technologies Ltd, based in Jersey, Channel Islands.
2.7Index of screens
Every screen shown in this manual, in order.
| Figure | Screen | Section |
|---|---|---|
| Figure 1 | The site map — every page of the portal, linked from the footer of any page. | 1.2 The page and its menu |
| Figure 2 | The sign-in page. Choose how you want to sign in at the top, then which kind of account you have. | 1.3 Signing in |
| Figure 3 | The code box. Each digit moves you on to the next field automatically. | 1.3 Signing in |
| Figure 4 | If the details do not match an account, the page says so and offers to take you to registration. | 1.3 Signing in |
| Figure 5 | Registration. The button stays greyed out until every field is filled in. | 1.4 Creating an account |
| Figure 6 | Confirming the code finishes registration. You can then install the app and sign in on your phone. | 1.4 Creating an account |
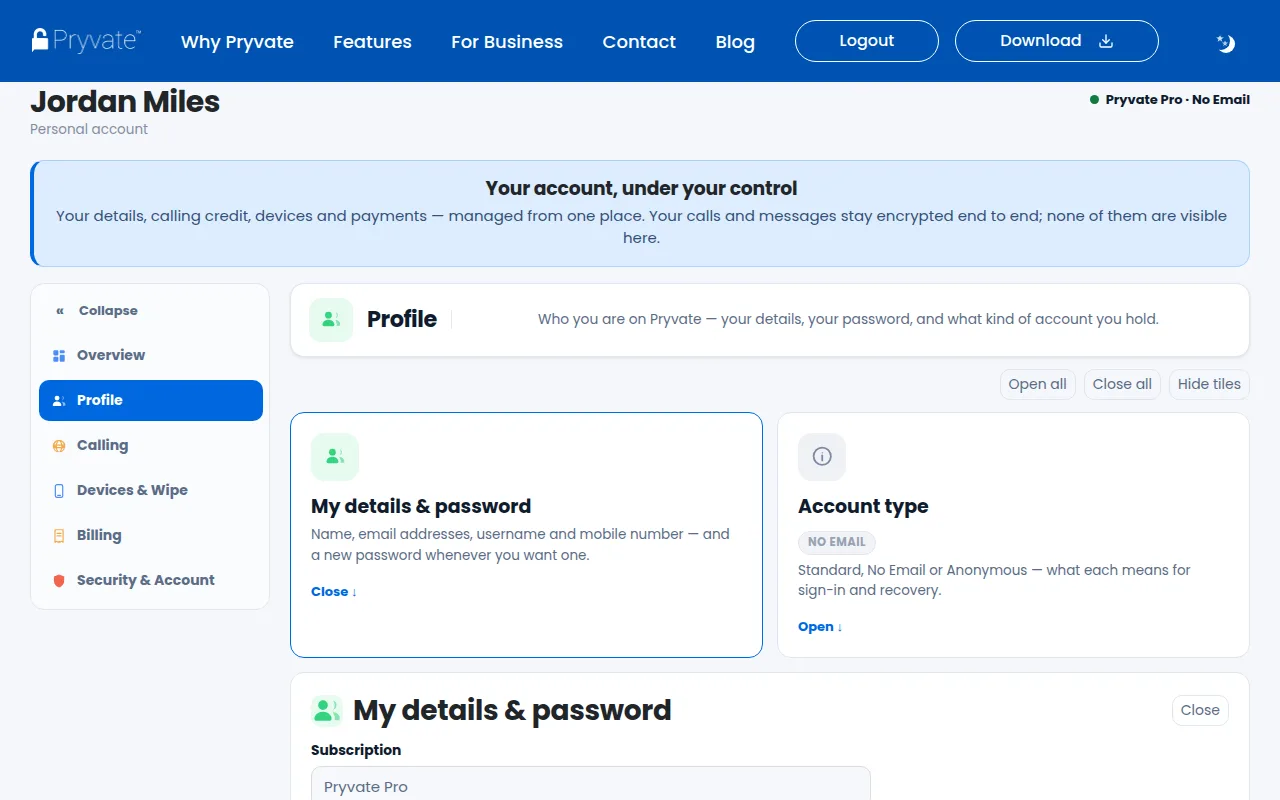
| Figure 7 | A No Email account — the badge in the page header shows the kind, and the profile carries no email fields. | 1.5 The three kinds of account |
| Figure 8 | An Anonymous account — the number is fixed, so the profile offers no link to change it. | 1.5 The three kinds of account |
| Figure 9 | The Overview. The status band reads your subscription, account kind, calling credit, device count and wipe readiness; the cards below jump straight into each section. | 1.6 Your account page |
| Figure 10 | Profile — the My details & password panel. Tiles above, the form beneath. | 1.7 Changing your details |
| Figure 11 | Security & Account — password and recovery, privacy, your organisation, and deletion, each behind its own tile. | 1.8 Your password |
| Figure 12 | Recovering your username. Lookups by mobile are limited to one a day. | 1.9 If you have forgotten your details |
| Figure 13 | Calling — your balance and dial-out number, with the top-up a click away. | 1.10 Your calling credit and number |
| Figure 14 | Topping up — pick an amount, confirm, and pay through PayPal. | 1.10 Your calling credit and number |
| Figure 15 | Call history, in the page — search it, page through it, or select Open full page for the complete Recent / Outgoing / Incoming view. | 1.11 Call history |
| Figure 16 | Billing — every payment in the page, with receipts a click away. | 1.12 Payments, receipts and refunds |
| Figure 17 | The two options: a one-off purchase, or the monthly Protection plan covering repeat wipes. | 1.13 Devices & Remote Wipe |
| Figure 18 | My devices — every device signed in to your account, each with its own wipe control, and Wipe all devices beneath. | 1.13 Devices & Remote Wipe |
| Figure 19 | The confirmation names the exact device and spells out the scope before anything is sent. | 1.13 Devices & Remote Wipe |
| Figure 20 | The invitation page. The company's name is shown so you can check it is the one you expect. | 1.14 If your company invites you |
| Figure 21 | Confirmation once you have accepted. | 1.14 If your company invites you |
| Figure 22 | An invitation that was left too long. | 1.14 If your company invites you |
| Figure 23 | Requesting account deletion. | 1.15 Deleting your account |